Friday, June 27, 2014

Gone fishing

Gone fishing, Chris Rea, beautiful song.

There's something wonderful about researching for a job one is going to do. I had a good time searching the internet for trouts, colors and how the water is colored. I found lots of stuff to work from, and now I feel I know a bit more about the topic than before.
I sat down and sketched some fishes, still not sure whether to paint one fish or several, on my piece. The biting one is my favorite, so that one has to be painted. I even painted one of my sketches, on sketching paper, just to try out some colors.


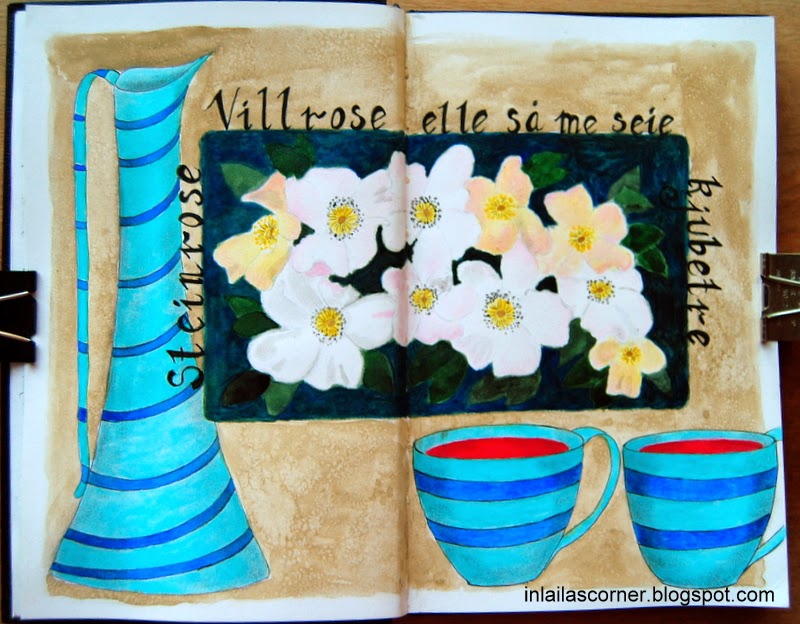
I found I would like to make a test, just to see if I really could do it, and get a fairly good result. I used a 100% cotton watercolor paper, and that is the best I've ever paint on. It was so easy to get the transitions smooth and good. At one stage, my piece looked like the one below. It has changed a bit, but this is a good close up.


This is the paper pad. Best ever for me.


Here I'm done, I can see things to change but the wide open mouth is done deliberately. I want people to know that when I'm fishing, all the fishes are lined up ready to bite my hook. LOL.


This photo is very close to my original painting, the colors that is. Mostly I've used flat watercolors, but I've been glazing using Twinkling H2O's. In a certain angle the fish is glittering like it's wet and fresh out of the water. Egyptian Gold, Chestnut Brown and Iscicles are used for glazing.


Let me end by saying thank you all for your lovely comments and visits, it warms my heart ans thrills me to read your words. Enjoy your summer and have a lovely weekend!

I'll link this post to Friday Sketches and Paint Party Friday.

Wednesday, June 25, 2014

SOC week 3

I've had some busy days.

My mom is home for summer, and that means a lot of driving for me. So, I chose to make something simple this week, an onion. This weeks colors are some I don't use much, they have never been among my favorites, but to my surprise they work well with the onion.


Did you know that since before pre-historic time the onion has been told to have healing properties of various disorders? Let me tell you some.

Indigestion - Treatment : 2 large onions cut into slices, boil in 1 liter water some hours. Drink one glas decoction twice a day.

Cold/cough : Cut an onion in two halves and put them at your bedside table. Make sure you breathe in the smell during the night.

Anemia, arthritis, overexertion : 100 grams chopped onion  in 1 liter white wine 48 hours, add a tbl spoon honey. One glas extract twice a day.

The most peculiar advice, old english. If you have toothache, do this : Take the peel from one onion and put it in a thimble (??), put the thimble onto one of the large toes of the patient. Don't you think this would be of great help? LOL.

I have this little booklet all about onions. There is alot more advices,, but I can't write them all. I love all kinds of old advices, proverbs and weather signs. There is much wisdom and some completely useless things as well. It's very funny to read though.

Thank you all for your lovely comments on last weeks post, I had a great time reading them all. Thanks also for visiting now, I hope you'll learn something important. LOL.

Tuesday, June 24, 2014

A doodling challenge.

I was tempted on this challenge.

Judy West announced that she would host a doodling challenge to celebrate her new book. You can read all about it here, and if you hurry there's still time to enter the challenge.
What she asked us to do, was to decorate a subject of her drawing, link it up to her blog and we're in a drawing. The winner will get a copy of her new book for free.
What I had to work with was what you see below.


This is on the front cover of her book, and she chose for us to decorate it.

Below is my take on it.


Most of all I want to do it over again, but I don't have time for that. The last thing I did was to make the background, and I should have done that first. It's a bit wonky, but it'll have to do for now. It's quite challenging to decorate other peoples drawings, one doesn't know what they might have had in mind when drawing it. But, it's a good exercice and fun too.

Now I off to link it up, enjoy your day!

Sunday, June 22, 2014

Would you care for a cuppa?

Tomorrow I'll have to go buy some art supplies.

One of our local stores is going to close the doors, and tomorrow they offer everything 80% off. I'm interested in pastel crayons, pro markers and not least drawing pads. I don't know how much they have left, but I'll have to see.


It's really sad they're closing up, because it's a very good art supply store. But, the owner died and there's no one to carry it on. Guess that's life, but sad anyway.


I drew this in my  Zeta journal. Flowers, cups and jug are done in Twinkling H2O's and the rest is flat watercolors. I was up very early one morning, some would even call it in the middle of the night, everything was quiet in the house and out. Those early hours are very good working hours for me, it's so good sitting there nothing disturbing me. I can be completely present, or my mind can fly wherever it wants. Those are treasured moments.
It's wild roses, not the ones I have in my garden though. I've used a photo as inspiration. I felt I needed something more than a sentered square, so I added the cups and jug. It's meant to be tea made from rosehips, but it's not excactly a teapot. Therefore I decided it's icetea, clever eh?
So, would you care for a cuppa?


Thanks for stopping by, I hope you've enjoyed your visit.
Have a fabulous Sunday!

Friday, June 20, 2014

Bowl of Beauty

Right now my peony, Bowl of Beauty, is blooming.

It's by far my favorite peony. I once picked a huge bouquet and gave to a friend to her 50th birthday. She was going to have lots of collegues (teachers) to coffee and cakes, and I was there to help her out. The peonies served as table decoration and some creative teachers discussed how I had made these flowers. One of them concluded that I had stuck the "yellow flower" through a not filled peony. The other ones agreed to that and spoke of me as very creative, while the fact was that they were the creative ones in this case. Each year I think of this when they start blooming, and I can't help smiling.


Happy Friday Sketches and PPF everyone.

I had to sketch my peonies, but I have delayed it. Wasn't sure I could do it, at least not good enough. But, I did it and the result isn't bad at all. The only thing I wouldn't do over again, is to outline the flowers. That black line is too hard against the "fragile" flowers. Otherwise I'm very pleased.


The background seems too dark in my photo, but in person it isn't. Don't know excactly what happened.
What's your favorite flowers? I find it hard to pick one flower to call my favorite, there is so many beautiful flowers. I even love some weeds as well, not smart with a pretty large garden.
Next on my sketching list is the wild rose. It's blooming as well right now and it's so beautiful. Old flowers (3 days) almost white with a dark brown/black center, newly sprung flowers, beautiful medium pink and a yellow center.The buds are more strongly pink, and they all appear, on my bush, at the same time.

Thank you for visiting and for your lovely comments, it's much appreciated.

I'll link this post to Friday Sketches and Paint Party Friday.

Tuesday, June 17, 2014

Lets face it.

SOC 4 week 2

I drew this face a year ago for another project I did, I like it and traced it to use it over again. It is quite a challenge to paint using just a couple of colors. Although I have lots of colors, I couldn't find one single color named coral, so I had to mix two colors to get a coral one.


This has turned out to be an excellent practice of colormixing for me. The palest areas have lots and lots of water mixed into the color to tone it down. The coral and teal makes a brilliant grey to shade with, so that was an easy task.
Her grey hair area is made using the mix of coral and teal and on top I've used white ink. I've wanted to try doodling on top of a face for a long time, and now, I've done it. It feels a bit odd, but makes the face look very special.
Colors used are Neocolors 2, Malachite green, Salmon pink and Raspberry red. In addition I used white ink and my black Micron pen.
A big thank you to Kristin for hosting this fun event, and also a big thank you to all of you who visited and left your supportive comments. It's so much fun to read them all, and much appreciated.

Saturday, June 14, 2014

Summer of color 4

This is the first time I'm participating in this fun event.

I wasn't sure if I could make it so I'm a little late with my entry. I chose to use one of my own handmade stamps for this piece. It's also made on a handmade paper.

I found it hard to get a good image from the stamp, not sure what didn't work but I used a sharpie to get the lines even, after stamping. I've used Twinkling H2O's for my colors and am pleased with my result based on how quick it was done.


There's not much pure yellow in my piece, but it's certainly used to make the greens and also to mix up the brown color for the trees. My pink spots are some butterflies just to add some life to the piece.


I hope to put a little more effort in next week, and I'm looking forward to that.
Have a beautiful weekend everyone, and thanks for visiting.

Friday, June 13, 2014

Doodling all week

Happy PPF and Friday Sketches everyone!

I've been so busy making my last mandala, I've had time for nothing else.
The sketch I'm sharing is in fact an old one, and has nothing to do with my garden or anything in nature at all. But, as a young girl once said to me, is it your super glasses you want me to find for you. Yes, they are. They are a bit too strong, and my prefered ones when making tiny details.


A bit wonky, but still a sketch and  good practice for shading.

Now, what I've been doing all week has been a tremendous job. So many small details and to paint it was a challenge as well. Below is the finished drawing.


The paper I used for this one is a 600 grams watercolor paper sized 76 x 56 cms. The diameter of my mandala is 52 cms. A very large work for being me.
I had made some testing, in beforehand, to choose the different designs. I liked it when done drawing, and it's always a question whether to add paint or not. I'm a color lover so I ended up painting it.


The Norwegian royal residence, in Oslo, has a beautiful ball room, and some, even more beautiful, hand painted wall decorations. Each time I see photos of them, I get this special feel, and that was how I were inspired. I would try to capture that feel. Not necessarily by using the same colors, but the over all feel.


I'm not sure I did excactly that, but there is this soft feel involved, even though I used some pretty dark colors. I've called this one " Secrets" because that's how it feels like to me. It doesn't mean that I've been hiding any secrets in it, but I think any viewer can find some connections to their own life in it, secrets or not.


I'm still not sure whether to add white "star dots" to the grey area above. I'll just have to let it be for a while to see, as long as I'm not sure I won't do it.


I'm very pleased with my result, even if I didn't achieve what I were trying to. This on is going to be framed and put on my wall. It'll be a good  piece representing my doodling side.

Thank you for popping in and enjoy your weekend.

Friday, June 6, 2014

A huge work.

Yesterday I started a new work, and it's huge.

It isn't the flowers I were making in last weeks post, it's doodling. I was so inspired by a piece I saw on FB, that I had to make my own.
I went out and bought a large sheet of paper, 76 x 56 cms, 600 grams watercolor paper. So, I felt for testing some patterns, and find what suits well together for my project. Below is some tests.

It's very useful to test things, at least for me, that way I saw what worked and what had to be changed a bit. The outer edge isn't going into my work at all, I have some other ideas.


I've never worked on a piece of this size before, and I were vorried to set any kinf of unwelcome marks on my sheet while working. To deal with that, I just used delipaper to make a couple of loops and taped them to my working table. The large sheet were stuck into the loops. The delipaper protect my sheet and holds it to place as well, and best of all, it's just the working space that's "open".


I can move my sheet both left and right, which makes this a super solution for me.


Above is how far I've come yet. This will take alot of time to finish, so I might take breaks to do other stuff in between.
Not much color to show you this week, but it'll come further on I guess.
Happy PPF everyone and have a pleasant weekend!

Thursday, June 5, 2014

In the garden right now.

I took my camera for a walk in the garden yesterday evening.

Lots going on at the moment.

Rhododendrons


Irises on their fullest


I had to rescue this daisy from the slugs earlier this spring. It's now potted and is coming with at least 6 buds.


 Peonies, some towards the end and some just sprung.


The lilacs have been beautiful this year, and some days the whole area has had the scent of them.


The giant Alliums are coming this year as well.


Some potted roses


And the Hostas, I have lots and lots of them. This is a close up, I love how the raindrops are reflecting the light.

There is a lot more blooming now, but I can't drown you with photos.
Have a beautiful day, everyone.

Wednesday, June 4, 2014

Finally done

Phew.... that was a real stretch of my creative muscle.

I trustfully started adding the treads, but what a task! I used masking tape to fasten them and a needle to weave them together, one by one. Below is a close up on how it looked when all the weaving were done.


Next thing was to glue it all down to the open spaces, I used matte medium for that job. When completely dry I used an excacto knife to cut all the treads. Only ones left is in the open spaces. See photo below.


The next one is a close up of the finished piece. I used twinks, Egyptian gold, to suggest the gold threads in the more solid parts of the top "fabric".


And finally, the finished piece. It isn't what I initially had in mind, but I'm very pleased with my result. I won't give up on trying to make the surface I wanted, but right now I need to do something quite different.

Last post on this project, I promise. Thanks for visiting, I hope you enjoyed my process.

Tuesday, June 3, 2014

See through experiment, part two

I did manage to finish off my project yesterday.

First photo today shows my piece after some shading. After that it was time to start the top layer.


I wanted the top "fabric" to have a color other than white, so I chose to use a warm sepia, Sennelier watercolor, mixed down with a lot of water. Close to the edges around the openings I darkened the color to suggest the fabric to curl a bit inwards.
Now, when it's over, I can see that at this point I stopped trusting my process. What I had in mind for this piece was to fill the openings with a haze of white (acrylics) and then use a medium rough fabric to pick up some paint and leave an image looking like the surface of a canvas. I would still be able to see through, but it would look like fabric in the open spaces.

I was so afraid to ruin it all that I secured myself by adding a layer of clear tar gel. That would allow me to remowe the next layer if I failed. Now I think I would have made it if I didn't use that gel. Below you see how it looked when top layer is painted.


Next photo shows my piece with two layers of a milky paint on top of the open spaces. This was for toning down the colors and also I hoped for it to look like a thin see through fabric. I wasn't able to make the canvas look I had in mind, so at a certain point I stopped trying.


To finish it off I added some texture to the sepia areas, simply by scribbling with a couple of colored pencils. My question was : Is it possible to work with layers and still see throug the top layer? Yes it is, even thoug I didn't gain the result I was looking for.


When I woke up this morning I had the solution. I'll simply use threads to make the spaces look like fabric. It will take me soome time to do that, so I'll have to come back with the final result. Hopefully tomorrow. I was asked a question yesterday, what I used for masking a watercolor painting. I use masking fluid and a very fine nib for fine lines.
Thank you for stopping by, it's much appreciated.

Monday, June 2, 2014

See through experiment.

I have been working on an experiment lately.

My question was, Is it possible to work two layers on top of each other, and make it look like the top layer is transparent? I got the idea when a friend of mine, Marguerite Meara, shared a blogpost on a FB group I'm part of. I didn't use a regular stencil, but a fabric I have, to draw down the design and then I doodled in the underlying shapes.


The photo above shows the finished drawing, from this point it's all exciting. First of all to color in my design. Doodling is normally black and white, at least in my head, but I wanted colors in this project so I took that risk. I have a box containing 12 inktense watercolor pencils, Derwent, and that's what I used for coloring. The advantage of using these pencils is that they will turn permanent once dried, and that suits well for my further plans. Below, all shapes colored.


 In my head, this is two fabrics on top of each other, and I wanted the top layer  to be transparent even when I'm finished painting that layer too. But first I needed to complete the underlying part. The dark blue parts were fun to make, I used salt to make it look patterned, and it's really beautiful in person. When that was dry I did the stitching, and painted the stitches with a pink color.


So far everything looks like I wanted to, except, I'm a bit worried about all the colors, it looks a bit messy, but I hope to be able to tone it all down a bit. Next thing is to shade and then I'll start working the top layer.
I hope to be back tomorrow to show you the second half of my experiment.
Thanks for visiting, I hope you enjoyed it.